
Ezoic’s premium ad network has been a godsend, as it has changed the way we create and monetize content. Within just a single month after switching over from Google’s AdSense, we made 3.5x more in ad revenue from Ezoic. These days, we’re making at least 3x more in ad revenue from Ezoic within a single day, compared to AdSense over the span of an entire month.
Thanks to Ezoic’s methods of optimizing monetization and maximizing ad revenue for our case study domain, we’ve been able to reinvest thousands of dollars into making fresh content. It’s a perpetual cycle, as new articles and pages attract more traffic, and over time, higher yields from ad earnings. This alone has led to monstrous growth for our site, and the momentum doesn’t stop there.
For the most part, Ezoic is pretty easy to use. Once it’s been activated, their AI and machine learning would figure out the most optimal way of showing ads on your site. Through a process of automated trial and error, it’ll eventually nail down the perfect template. However, that’s not to say that using Ezoic is autopilot from the get-go, as you’ll have to spend a lot of time setting it up first.
This valuable moment could be consequential for how much you might earn over time. One incorrect setting or poor configuration, and you’d practically be knee-capping your potential ad earnings. Or to put it simply, leaving money on the table. If you’re already making the transition over to using Ezoic, here are some quick pointers for how to best optimize Ezoic for maximal ad revenue…
- 1 (Optimization Goals)
- 2 (Ad Tester)
- 3 (Anchor Ads)
- 4 (Placeholders)
- 5 (Mediation)
- 6 (Header Bidding Mediation)
- 7 (Native Ads)
- 8 (Ads.txt)
- 9 (Objectionable Content)
- 10 (Caching)
- 11 (Ezoic Leap) – Now removed from Ezoic
- 12 (Analytics)
- 13 (Video Player)
- 14 (Tag Tester)
Step 1 – Optimization Goals (Set It To ‘Revenue Focused’)
First thing’s first, you’ll have to go into your Settings page (within your Ezoic dashboard), and inspect the Optimization Goals section. This is where you’re essentially telling Ezoic’s AI how hard or soft you want the monetization on your site to be. In essence, more ads versus fewer ads.

If you want maximum ad revenue, you should ideally have this set to Revenue Focused. In this mode, Ezoic will show the maximum number of ads on your page. Specifically, the highest amount that could most feasibly be included on a single page. And, without breaching Google’s ad policies.

The principle is quite simple… The more ads you show, the more folks visiting your site will have to scroll past. A higher volume of ads could increase a visitor’s interest and may intrigue them enough to click on those ads. Subsequently, earning you higher ad revenue.
Therefore, maximizing ad revenue could be achieved by setting your Optimization Goals to Revenue Focused. Aside from that, you have other options. Although, this is assuming that you’re willing to sacrifice ad revenue for improved user experience:
- Balanced – This is the default setting, which creates a halfway monetization strategy. In other words, a compromise between showing just enough ads, but not too many.
- User Experience Focused – It’s a fact that adding more ads can impact user experience. More ads will slow down page loading times, or obscure and distract you from the actual content. If you don’t care too much for ad revenue, you can tell Ezoic to reduce the number of ads shown.
- Custom – In this setting, Ezoic allows you to manually set how many ads you want to display on a page. Set it once, and Ezoic will tailor its AI to automatically optimize and recalibrate its ad template based on your input.
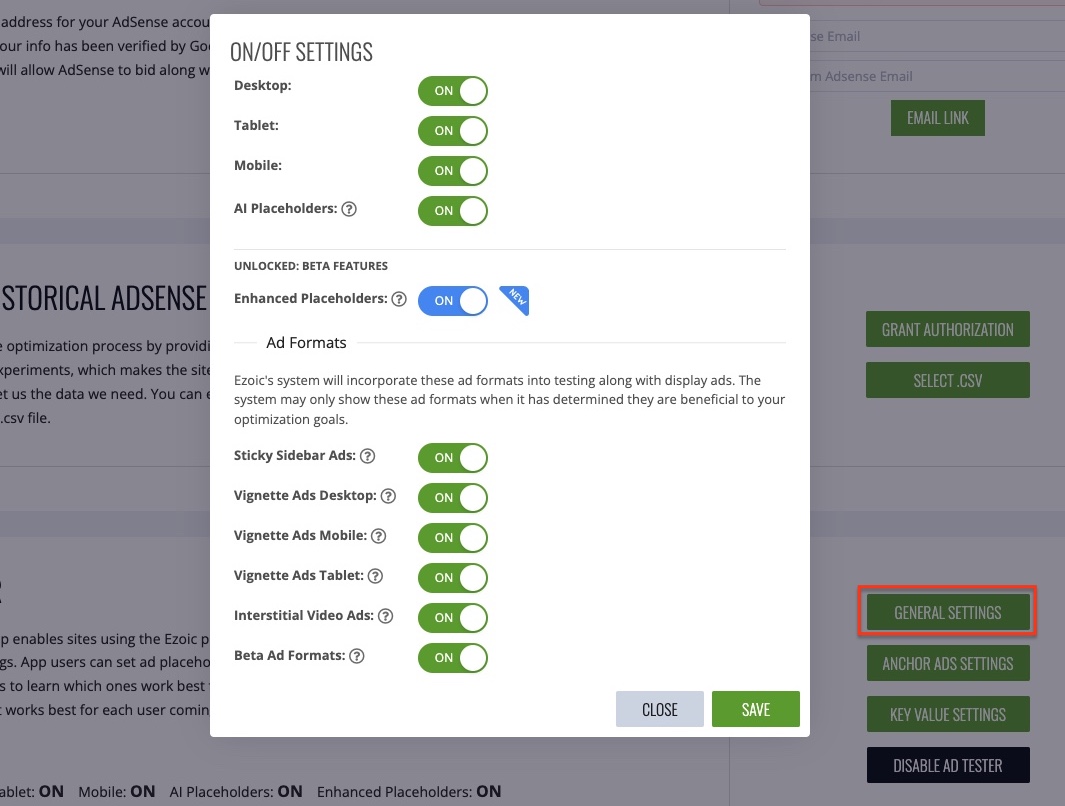
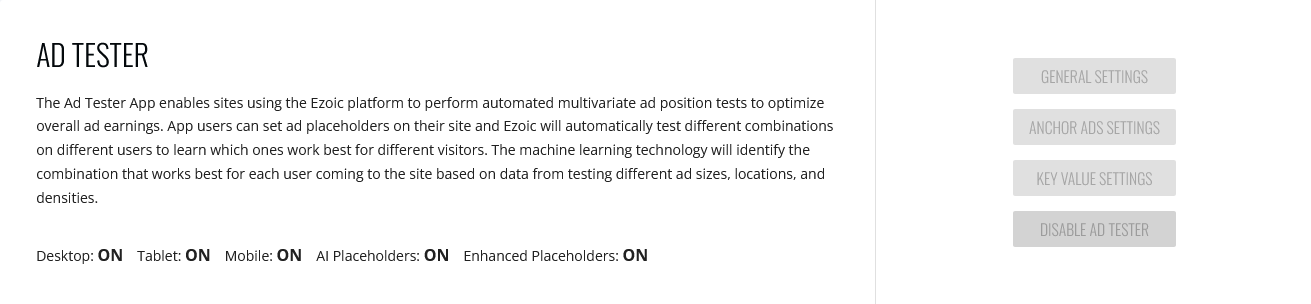
Step 2 – Ad Tester (Turn On All The Settings)
Next, you’ll have to hop over to the Monetization page on the dashboard. This is the most important section of maximizing ad revenue, as you’re configuring how Ezoic will ultimately monetize your site. Therefore, you should look through and carefully consider every single setting here.

You can start with Ad Tester. This is the interface where Ezoic’s AI will take your ad placeholders and try to optimize its layout in the best way it can. Ezoic’s AI could test thousands or at times millions of different combinations. Each test mostly varies these ad placeholders in their:
- Placement – Where would ads appear on a page (header, footer, side margin, between paragraphs, etc.)
- Density – How many ads should be shown at a time on a page (most pages average 20 placeholders for the top-end, but Ezoic could power as many as 100 ads at once)
- Sizing – How large should each ad placeholder be and what orientation do they show up as (medium, large, or small banners, and in landscape or portrait)
- Type – What type of ads would be displayed (display ads, native ads, anchor ads, sidebar ads, etc.)
Ezoic’s Ad Tester would experiment with each possible combination, eventually learning what works and what doesn’t. Consequently, helping to optimize your ad revenue. When you’re in the Ad Tester settings, make sure that all the settings you see are enabled. This includes Beta Ad Formats.
All of these settings denote the possible ad options that your site could be monetized with. If some of them aren’t enabled, certain types or formats of ads may not appear. Note that some of these settings are turned off by default. Enabling them ensures that you’re not missing out on ad revenue.
Step 3 – Anchor Ads (Turn This On)
Moving on, you can look at the Anchor Ads option (also on the Monetization page). As the name may imply, Anchor Ads are ad placeholders that are anchored onto your screen. Specifically, these are the ad spots that usually show up at the bottom of a page as an overlay.
As you scroll through a page, this Anchor Ad remains visible on your screen. In the settings here, you have to make sure that every ‘Site-Wide’ setting is turned on. It includes enabling Anchor Ads in the first place. Plus, double-check that it’s been turned on for all devices.
These relate to what devices your visitors might be browsing on – desktop-, tablet-, and mobile-type web browsers. Anchor Ads are, in our own experience, among the highest-earning ads in our case study domain. Without having it turned on, you’re certainly missing out on a lot of extra earnings.
This is especially the case with the Enhanced Placeholders option. Once turned on, Ezoic would then automatically inject more ad banners on your website compared to the original layout. Again, more ads equal higher ad revenue. So, be wary of checking these configurations.
Step 4 – Ad Placeholders (Get The Chrome Extension)
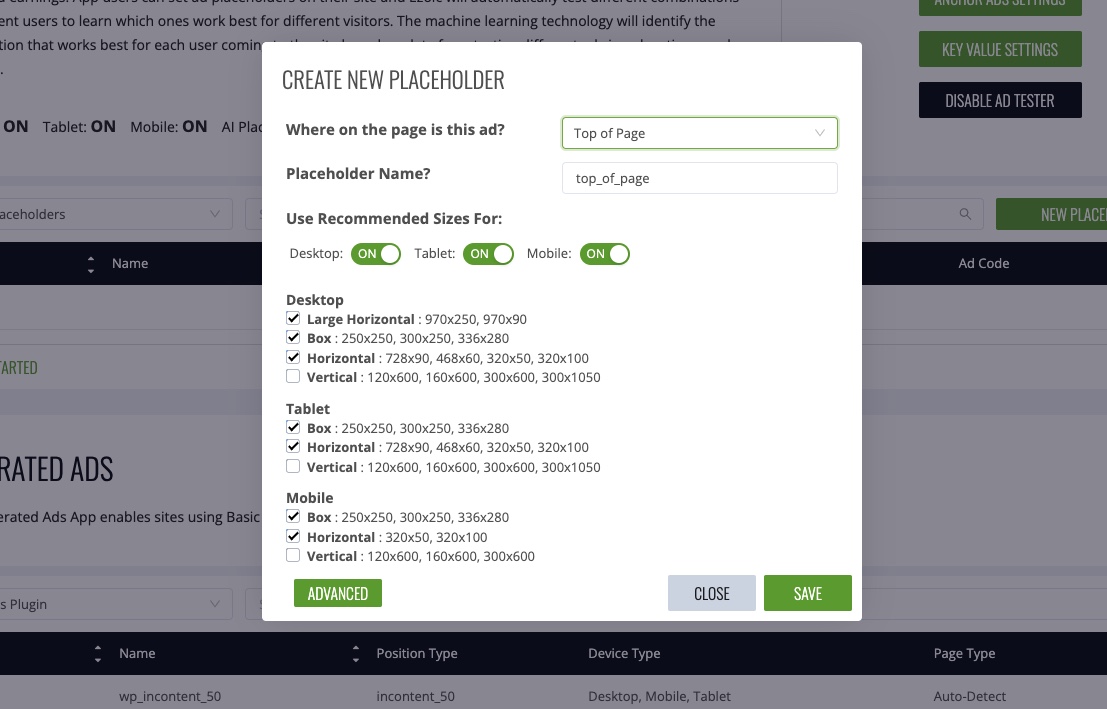
Speaking of, you should now take a peek at your ad placeholders. On Ezoic, you have to start out by creating some ad placeholders, to begin with. Once again, these options are accessible in the Ezoic dashboard, within the Monetization page. However, there are alternatives.
You can create ad placeholders with Ezoic’s WordPress plugin. And, there’s even a Chrome extension, which works rather well. With this extension, you can get a visual overview of how ads would appear on a page. This makes it much easier to configure and visualize the ad placeholders.
The extension gives you easy access to this information on the fly.
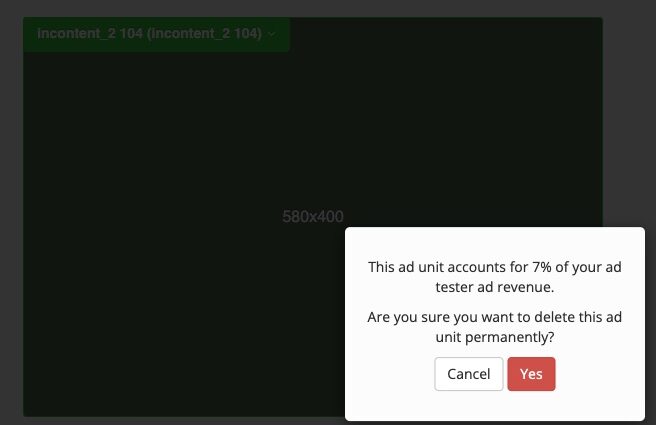
With this extension on hand, it’s a good idea to first ensure that you have a large red banner at the top of your page. In our experience, this particular spot (aka placeholder) on a page yields the most ad revenue. It’s the highest by far, followed by ads on the side margins of your page.
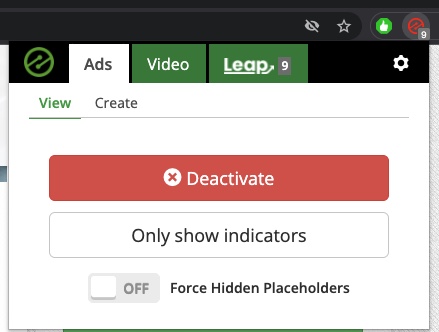
This extension can also let you see specifically how much a particular placeholder is earning overall. It’s a good way to get insight into how much each placeholder is earning. You can only find this information out by clicking delete on the placeholder. Then it will tell you the percentage of your earnings that come from this placeholder. Moreover, giving you a clue on the best ways to recalibrate the placement of your ads to improve your earnings.
This extension has loads of other settings to let you include as many placeholders as possible. While you’re there, just make sure that you squeeze in as many layout techniques. And, that they’re sized properly. The more the merrier, as it gives Ezoic’s AI more combinations to test with.
Here are a few more tips while we’re talking about placeholders:
A) Add As Many Placeholders As You Can
It’s worth remembering that with Ezoic, there’s no harm in including far too many placeholders. This is usually a bad idea (on other platforms), as it adversely impacts your site’s user experience and performance. This isn’t the case with Ezoic. At the end of the day, their AI is the one who will make the final adjustments.
To put it simply, you may as well create one of every type of placeholder. As you’re doing it, make sure you cover every single banner size that you can allow, and location on the page, and include as many of them as you can. Ezoic’s AI will optimize the final placement, density, sizing, and type of ads that get shown.
B) How To Create Placeholders
In short, Ezoic would find the best ones from that layout that you’ve just set and optimize all of it automatically. Of course, you’ll first have to make these placeholders and set them up on a page individually. It can be quite tedious, as you’ll have to configure every single one.
Once again, it comes down to placement (where ads show up) and sizing (how big the banners are). When you keep adding them, you increase density (how many ads would show up), and you’ll soon have to note down what type of ads that you’d like to show.
For every placeholder, you could also fine-tune it further. For example, you can decide if a specific placeholder should appear for all browsers. As a scenario, you might want this large placeholder appearing on desktop browsers, but you’d want to keep it off for mobile web browsers.

C) Seeing The AI Work
Albeit, know that everything you’ve set thus far isn’t always a given, as ad placeholders might not necessarily appear there. These placeholders that you’ve spent a lot of time setting up are merely seen as suggestions for Ezoic’s AI. To see this in action, run it through the Ad Tester Tool.
Here, Ezoic’s AI and machine learning will dynamically and automatically change the entire layout. For instance, it might want to show more ads compared to what you’ve initially set. Or, perhaps it might put them in different locations within a page, in contrast to your original placements.
In addition, Ezoic’s AI would alter a page’s layout and tailor it for specific site visitors. For example, Visitor A might see fewer ads or notice them being placed in different parts of a page compared to what Visitor B may notice. Machine learning will continually understand the best one.
This is all in the name of maximizing the ad space on your site. Essentially, generate as many ads as possible for every site visitor, but without there being too much to impact their experience. At the same time, ensure that these ads appear more enticing and are somewhat relevant.
D) Double-Checking The AI
So, does this all work? On our site, we manually created and placed around 20 placeholders. But once Ezoic’s AI was turned on (through Ad Tester), kept running, and left to optimize the layout, it went up. There are now nearly 80 ad placeholders that the AI thought of generating on its own.
Nevertheless, this is based around your initial template, but evolving it steadily to earn you more in ad revenue. It’s worth checking the correlation between the placeholders you created, and the ones that the AI made up. In particular, how few placeholders is the AI generating?
If you’re seeing that Ezoic’s AI isn’t creating a lot of extra ad placeholders in contrast to what you’ve initially put in… Or, if there are perhaps too few of them in the first place, it’s worth ensuring that your options are set properly. Otherwise, you could be missing out on plenty of ad revenue.
Step 5 – Mediation (Turn This On)
Once the placeholders are all sorted out, you can take a look at the Mediation settings within your Ezoic dashboard. Mediation is an incredibly powerful tool, where you can earn with Ezoic on top of your existing ad provider. This allows two separate revenue streams to earn you ad revenue.

For example, you could have your site fully monetized with ads from Ezoic, and have Mediation be turned on for Ad Provider A. But what does it actually do? Well, for the most part, the ads you see would most likely come from Ezoic, as they statistically earn you the most.
However, if Ezoic analyses that Ad Provider A could earn you more from its ads, Ezoic would swap its ads out in real-time (usually one or two placeholders) for ads from Ad Provider A. Once again, this is with the express goal of earning greater ad revenues for publishers.
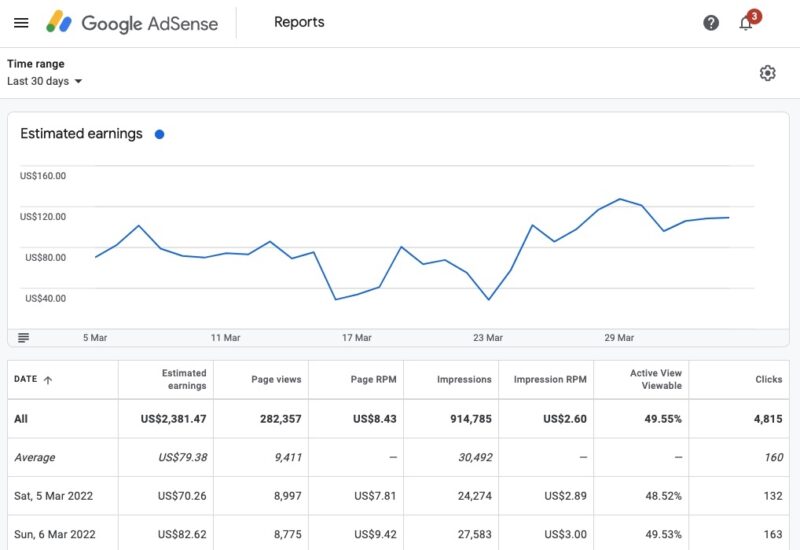
This is especially true with the AdSense Mediation settings. This essentially lets you earn from ads through Google’s AdSense network, alongside Ezoic’s. Back when we started, we barely made any money from AdSense, as most of the ad revenue came from Ezoic anyway.
Nonetheless, this imbalance eventually shifted slightly as our site began to attract more traffic. For example, we earned roughly $15,000 in ad revenue for the whole of March 2022. Over $1,600 of it are additional profits by Ezoic displaying more lucrative ads from Google on your page.

Step 6 – Header Bidding Mediation (Turn This On, Too)
It’s an overall net gain for you, so there’s no reason why you shouldn’t have Mediation turned on all the time. In addition to AdSense Mediation, there’s also Header Bidding Mediation. It’s otherwise a different name for pre-bidding, which is another neat way to eke out more ad revenues.
This is an instance where publishers offer ad spots to numerous ad exchanges before finally locking in an ad that’ll end up being shown. Advertisers on these exchanges could bid on that ad placement. As the bids keep racking up, you’ll earn more from that ad spot in return.
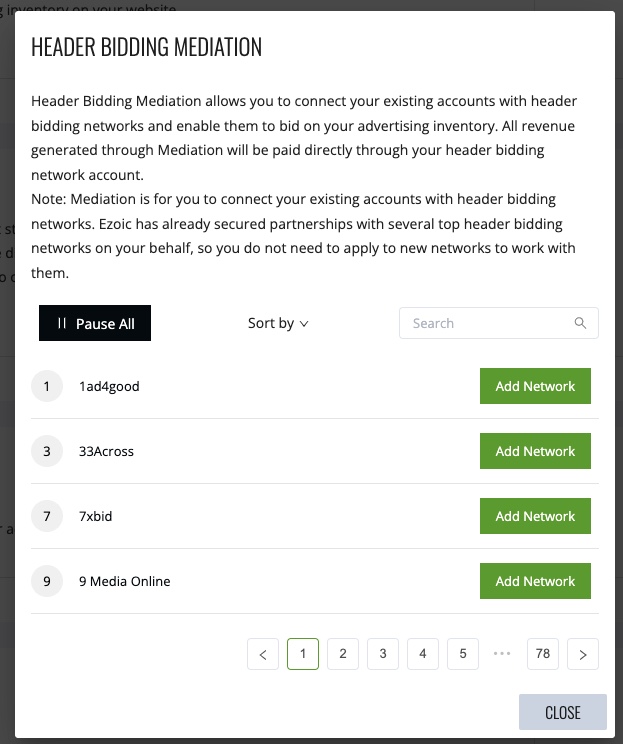
Should you already have a header bidding partner, you could add it to Ezoic’s Mediation process. Be sure to add as many as you can to improve the potential returns you could get from one or more ad spots. Again, there’s no reason to not turn this on and have it set up. But if you don’t already use header bidding, then there is no need to sign up to all these networks, chances are that Ezoic will earn more anyway.
Step 7 – Native Ads (Enable This)
Beyond that, we can move on to Native Ad units (also in the Monetization page on your dashboard). As handy of a setting as this is, it’s disabled by default. Native Ads are editorial or sponsored content that’s supposed to be relevant to what your website is all about, and appears as placeholders at the bottom.
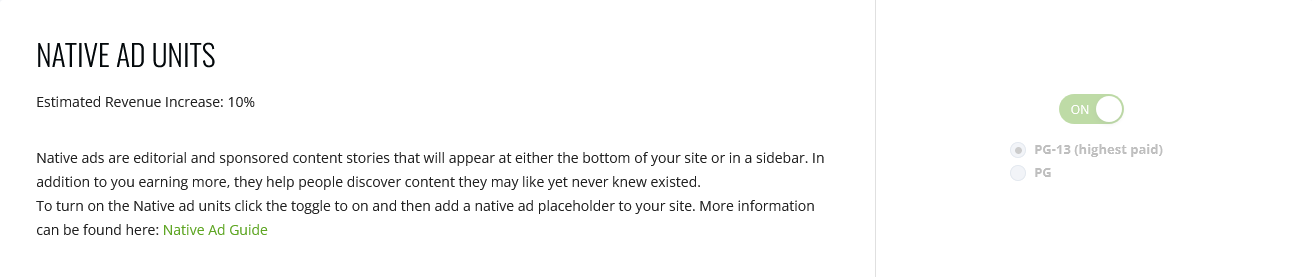
For example, let’s say you run a webpage dedicated to tips and tricks on all things related to computer hardware. With Native Ads turned on, the bottom of your page will now feature ad spots where other sites creating content around tech or computers will appear.
While this may seem like you’re inviting competition, it’s been known to be incredibly useful for your audience. Through Native Ads, visitors may discover new content that they might like. Plus, Ezoic’s estimates show that you could earn an additional 10% in ad revenue as a result.
Step 8 – Ads.txt File (Make Sure It’s Up To Date)
Sticking with the Monetization stuff, you’d be wise to make sure your site’s Ads.txt file is up to date. Remember that this is how you authorize advertisers to serve ads on your site. Without it, Ezoic is unable to provide monetization for your site, so make sure it’s updated from time to time.
From there, you could keep scrolling down in the Ezoic dashboard until you reach the Ad Categories section. Here, you can set the subject matter for the ads that appear on your site. If you want to try and maximize your site’s ad revenue, it’s best to simply turn them all on.
This will allow Ezoic to advertise a myriad of things, and target them relevantly to your visitors. Understandably, most of you would likely choose to tick off a few options. These are usually topics that might be too sensitive for your site, such as those revolving around adult content.
Step 9 – Objectionable Content (See If Anything’s Been Flagged)
When you’re finally done with all the Monetization stuff, you can head over to the Content page in your Ezoic dashboard. First thing’s first, you’ll want to scroll down into the Objectionable Content section. Now, see if there are any pages on your site that appear on this list.
This is where Ezoic would flag sites that contain items that might not be safe for monetization, and promptly block them from showing ads. For example, it might flag pages where you’ve made a mention of curse words or questionable or offensive language.
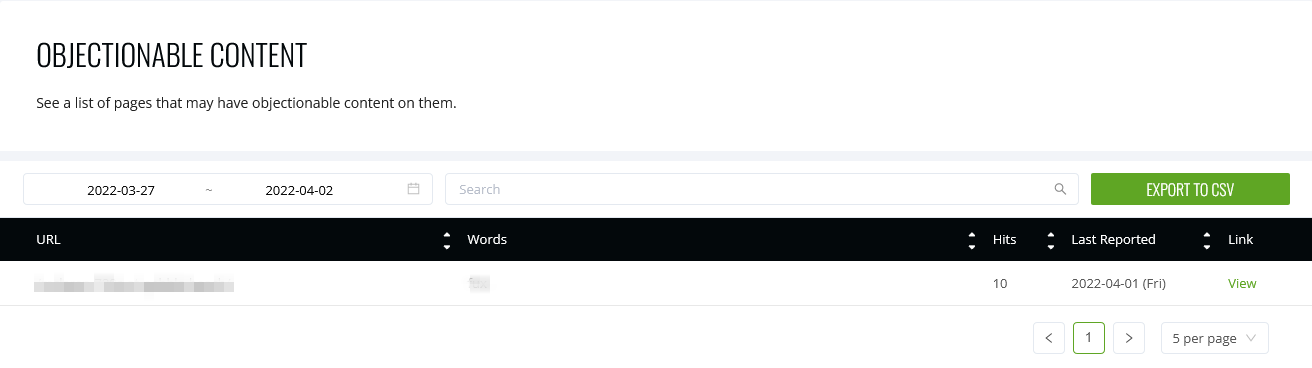
Ezoic has to monitor these, as per Google’s policies on advertising, given that Ezoic sources its ads from Google. You want to make sure that you don’t have any pages that have been flagged through the Objectionable Content filter.
Articles on this list won’t be monetized with Ezoic, and won’t show ads to earn you ad revenue, no matter how good the traffic is or how great the content remains. You can fix this by going into the pages that have been filtered out, and removing or changing all the words that Ezoic has flagged.
Step 10 – Caching (Turn On Cloud Caching)
Next up, we have to take a closer look at Ezoic’s Caching tools and services. These are accessible on the Speed page, before clicking on the Caching tab. This is a fairly significant part of monetization with Ezoic, as cache helps to load up your site faster. In general, improving performance.
Faster loading sites are typically more favorable to Google’s algorithms, which may bump them up higher in the search results. The first thing you’ll have to do is make sure that Ezoic Cloud Caching has been turned on.

This would help to increase the odds of getting a cache hit over a cache miss. What do ‘hit’ and ‘miss’ mean, and what’s their importance? First, here’s the definition for these two:
- Cache Hit – This is where a system pings the host to bring up cached content, and it’s successfully retrieved.
- Cache Miss – This is where a system pings the host to bring up cached content, but isn’t able to retrieve it.

Having analyzed our site, we can see that a cache hit is worth roughly 1/3 (33%) more than a cache miss. This counts for every pageview, and across larger traffic, this does make a big difference. As an example, let’s say that your typical EPMV (earnings per thousand visitors) for a cache hit is $30.
This means that a cache miss only earns you an EPMV of $20. Worse, you could have pages where there’s no caching on them (cache ‘off’). This would earn you around half as much as a cache hit. In that earlier example, EPMV for a cache off page would be around $19, as we’ve documented.
Step 12 – Analytics (Find Pages Not Earning Any Revenue)
When that’s dealt with, you can head over to the Analytics section of the Ezoic dashboard, where a separate page will load. Once the Analytics page has loaded up, find the Content page on the left-hand side menu bar, and click on Pages Without Revenue.
As the name suggests, this shows you all the pages within your website that aren’t monetized. To put this another way, these are pages that aren’t earning you any ad revenue. Ezoic’s Analytics can show you just how much traffic these un-monetized pages are pulling in.
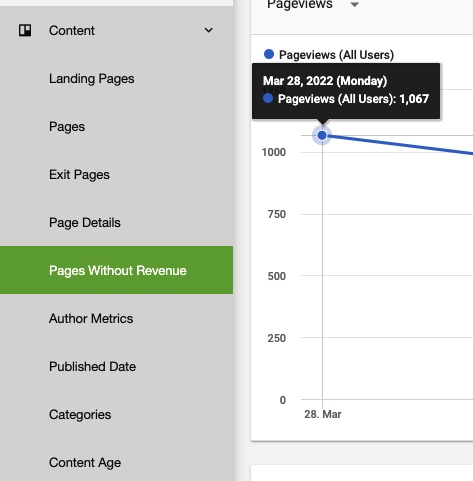
If you see pages here that are attracting high traffic, you may benefit by turning on monetization for them. However, do so at your own discretion. After all, some publishers may have editorial reasons why certain pages don’t show ads (thus, aren’t monetized).
Step 13 – Video Player (Host It Here Instead Of YouTube)
Next, you can head over to the Video page on the Ezoic dashboard. Here, you’ll find another hidden gem amongst the extra tools you get by signing up to Ezoic. They too have their own video hosting platform, sort of like YouTube. And, it works just as brilliantly for a no-cost add-on.
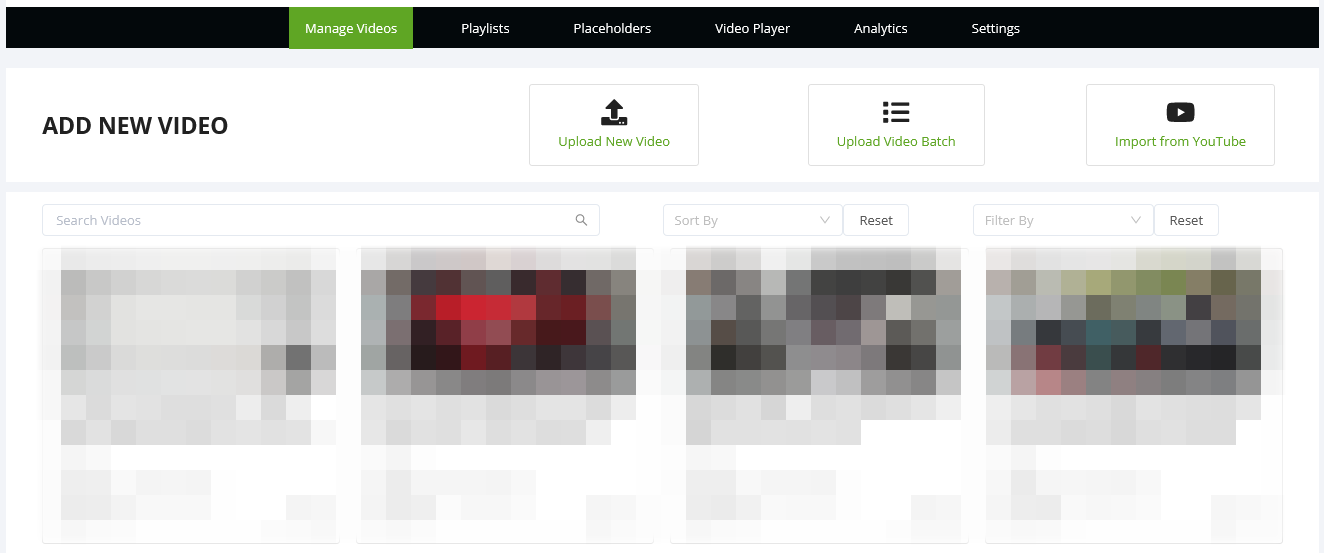
You could upload videos to be hosted on Ezoic. Later, embedding them on your site, you could even monetize these videos further with Ezoic-powered ads. This is especially useful for those who might have a large collection of videos on YouTube (or any other platform).
Instead, you’d like to gain more from monetizing those videos compared to AdSense (which is how YouTube videos are monetized). In that case, you can try monetizing it through Ezoic, in somewhat the same vein as you’ve monetized written content on your site.
Step 14 – Tag Tester (Optimise Your Titles)
Finally, we can head into the SEO page in the Ezoic dashboard, where you’ll find their impressive Tag Tester tool. Now, a key part of maximizing your site’s ad revenue is by pulling in more traffic. Thus, to have more people viewing or interacting with the ads that you have on your site.
Ezoic’s Tag Tester would expedite this process by testing what URLs or page titles might be more appealing to search engines. On top of that, which ones might have a higher chance of ranking well and getting picked up by a lot of people looking for them.
This is an entirely automated process, using Ezoic’s artificial intelligence. It’ll manage it by analyzing different title tags based on the search result rankings (in Google), pageviews, sessions, bounce rate, click-through rate, and several other criteria.

Tag Tester is commonly a lengthy process, as it does take between 1 to 2 weeks after you’ve fed one of your pages into it. A methodical scoring system will appear at the end, showing results that reflect the variables mentioned earlier.
Once the test is complete, Ezoic could even automatically change that page’s titles and URL to match the higher-scoring one as per that test. This could be another great way of optimizing your content, by putting it higher in the search results. With more traffic, this yields higher ad revenue.
Update – December 2025
Even with all the changes in the search and ad-tech landscape this year, everything outlined above is still highly relevant. The core steps around optimisation goals, placeholders, caching, mediation, and overall site structure continue to work the same today and remain the backbone of strong Ezoic performance. These points are still active, effective and reliable for maximising ad revenue in 2025. LEAP has now been removed from Ezoic. If you want a full, structured walkthrough of the entire system from keyword research to monetisation, my complete training course is available here.